How To Implement Involve Conversion Pixel In Google Tag Manager
This guide will help advertisers understand how to set up the Involve Conversion Pixel using Google Tag Manager (GTM).
- This guide assumes you’ve already received your Conversion Pixel details.
- Adjustments may be needed depending on your GTM setup.
Implementation Scenarios
There are 3 possible scenarios. Choose the one that best fits your situation:
-
Scenario 1: You know how to use GTM and already have a Data Layer available.
-
Scenario 2: You’re not familiar with GTM, but your website already has a Data Layer.
-
Scenario 3: You’re completely new to GTM and everything needs to be set up.
Scenario 1: You Have GTM Experience + Data Layer Ready
Step 1: Add the Conversion Tag Template
-
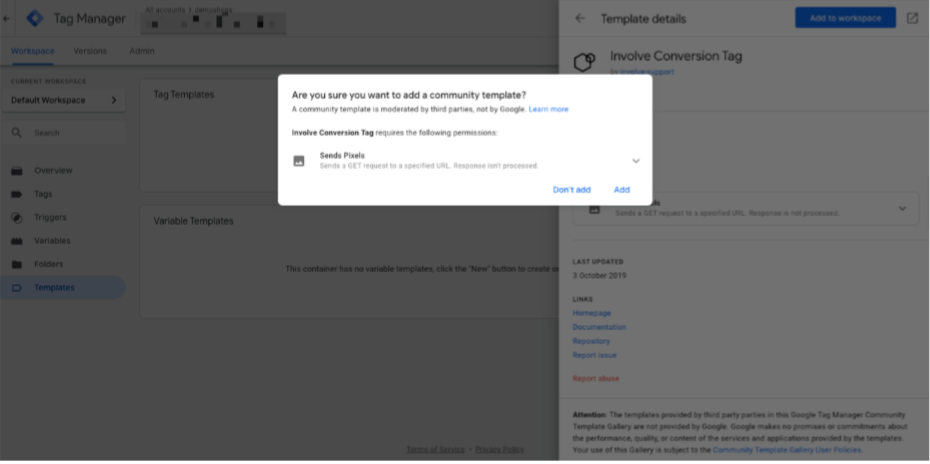
In GTM, go to Templates in the left menu.
-
Click Search Gallery and look for Involve Conversion Tag.

Click Add to Workspace, then confirm by clicking Add.
Step 2: Create a New Conversion Tag
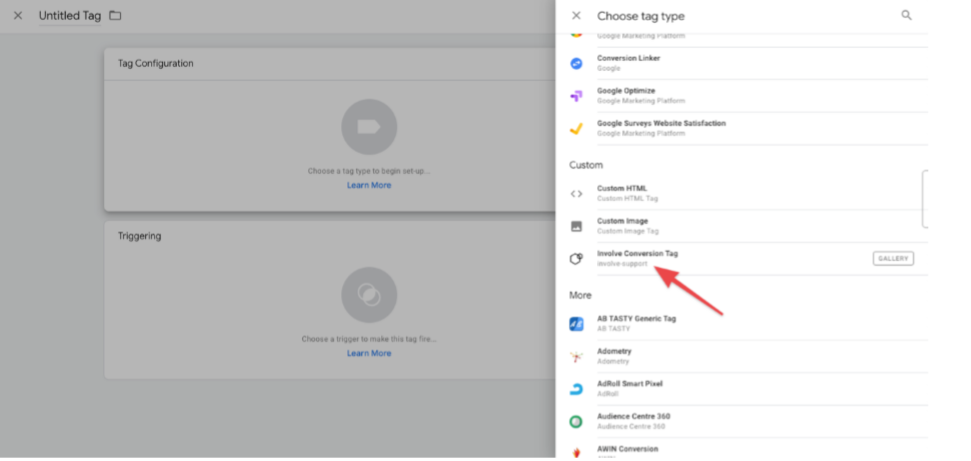
Go to Tags and select New Tag.
Choose Involve Conversion Tag.
Configure data points such as:
Order Number
Order Value
Currency
Offer ID (unique ID for your campaign – contact your Involve Asia Account Manager if you don’t have it).
Step 3: Add a Trigger
After creating your tag, click Add Trigger.

Select Page View – Window Loaded as the Trigger Type.
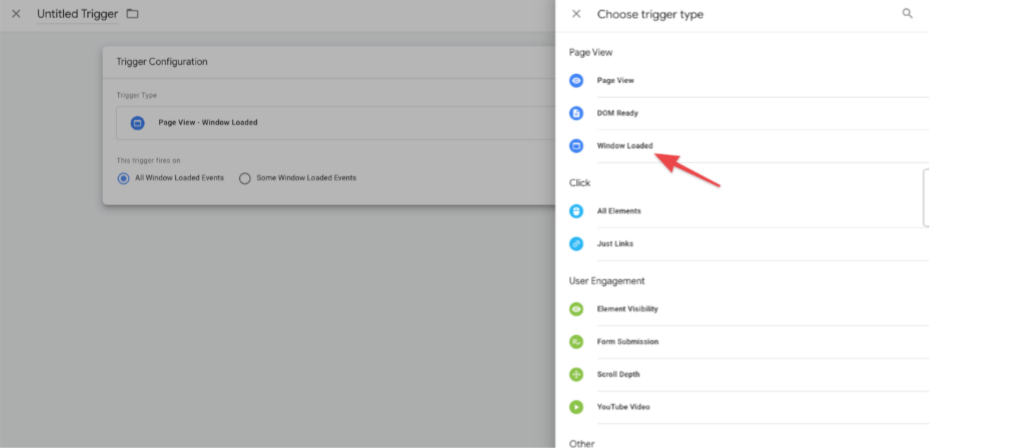
Ensure the trigger fires on your Thank You / Success page.
Example: Page URL → contains →
thankyou-page.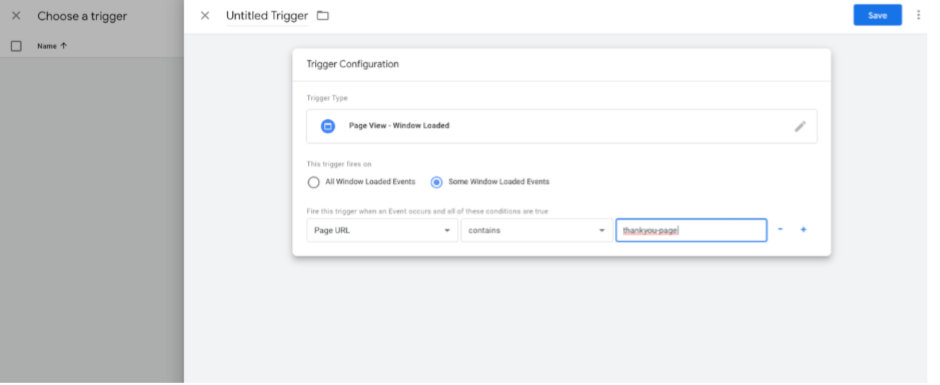
Step 4: Publish Your Workspace
Save your tag and trigger.
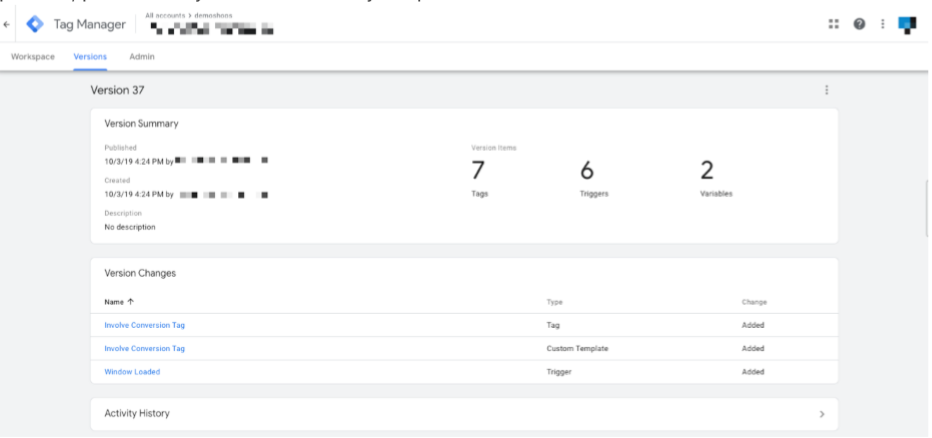
Click Submit & Publish.
If successful, you’ll see a new version number set live.
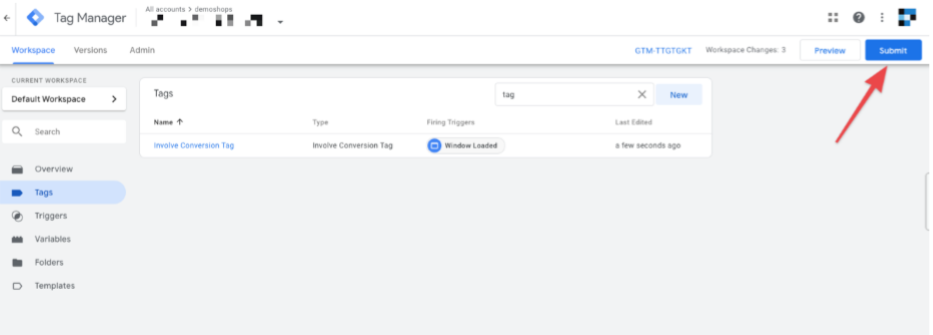
If errors occur, check your setup and retry.
Scenario 2 & 3: Setting Up a Data Layer
If you don’t have GTM variables yet, you’ll need to use a Data Layer to connect transaction details.
A typical Data Layer on your Thank You page may look like this:
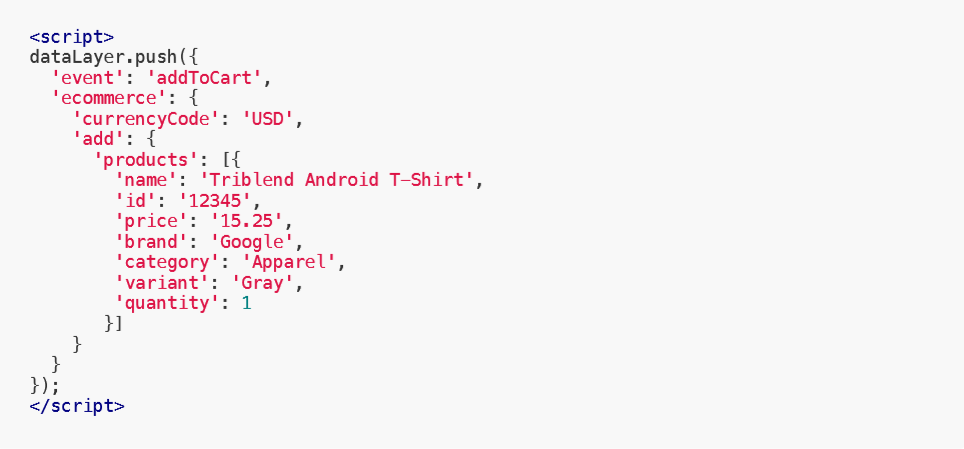
This Data Layer provides order details for GTM.
Once the Data Layer is set up, configure GTM variables to capture these values.
After variables are mapped, follow Scenario 1 steps to create your Conversion Tag.
For more help, check Google’s docs:
Summary
Scenario 1: Experienced users → Set up Conversion Tag + Trigger directly.
Scenario 2 & 3: Beginners → Add a Data Layer, set up GTM variables, then follow Scenario 1.
Once implemented, your conversions will be tracked in Involve Asia accurately.
Related Articles
Implementing a Data Layer on Your WooCommerce Website
A. Tracking affiliate sales with data layer Implementing a data layer makes it easier to accurately track affiliate sales. The data layer presents a uniform, standardized way to capture product/impression/transaction etc details on your website that ...GTM Guide For Advertiser - Magento 2
Implementing a Data Layer on Your Magento Website A. Tracking affiliate sales with data layer Implementing a data layer makes it easier to accurately track affiliate sales. The data layer presents a uniform, standardized way to capture ...Conversion Booster: Retargeting Solution with Involve Asia
What is Conversion Booster? Conversion Booster is Involve Asia’s CPS-based retargeting solution designed to help advertisers recover lost sales. It re-engages high-intent users who visited your site but left without completing a purchase or booking. ...How to Log In to the Involve Asia Advertiser Dashboard
The Advertiser Dashboard is your central hub to manage campaigns, track performance, and collaborate with publishers. Here’s how to log in securely and get started. How to Log In Go to the Involve Asia Advertiser Dashboard. Enter your registered ...How to Use the Conversion Report on Involve Asia Advertiser Dashboard
The Conversion Report helps you track and analyze your affiliate program’s conversions directly from your dashboard. You can filter by date, offer, status, and more — and even export your data for further review. Step 1: Access the Conversion Report ...